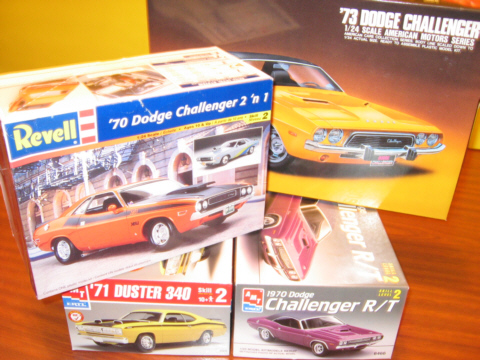
And this is my 1:24 scale model project. There were some plastic kits of the 1972-1974 modelyear in the market in the 70th and 80th and the only one still to order is the japanese ARII-Model. Nevertheless other editions, like from MPC, can still be found on e-bay. As all this kit are not as detailed and correct as the most actual kits I based the project on Revell-Monogram,s 1970 Challenger kit and used parts of the AMT 70´Challenger , the 71´Duster the ARII 73´Challenger as dicribed below. - The idea is to built a scale-replica of my 1973 Challenger, as shown in the MY 1973 section
My first step is the engine, the closed thing to my 318 I found was a 340 small-block
from ERTL´s 340 Duster
Kit, unfortunately with a manual transmission. I added MCG ignition wires and fuel line and mixed the engine paint from different blue tones to match Chrysler engine blue.

painted and detailed engine
To simulate th e 1973 steering wheel I cut back the 3rd spoke of Revell´s 1970 Challenger steering-wheel and added the 3 spoke-holes and a scatchbuild horn-pad to
the middle. The steering column with turn-signal level is from the 340 Duster with the respective Floor-Gear-Shifter mounted to column.
e 1973 steering wheel I cut back the 3rd spoke of Revell´s 1970 Challenger steering-wheel and added the 3 spoke-holes and a scatchbuild horn-pad to
the middle. The steering column with turn-signal level is from the 340 Duster with the respective Floor-Gear-Shifter mounted to column.
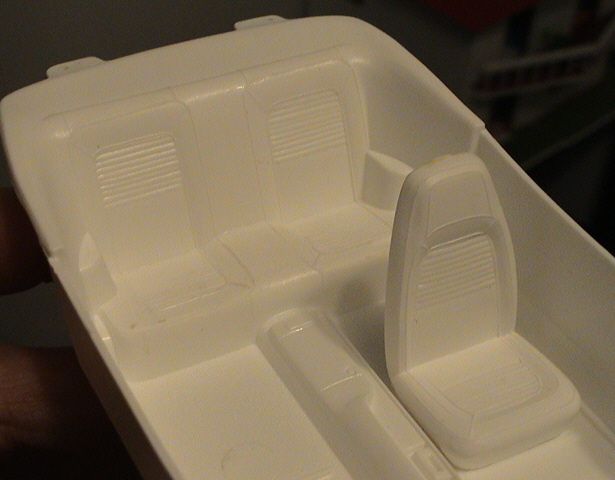
I decided to base the project on the Revell kit, while the
interieur and body is the most correct an detailed. It has nice, separate door panels and the correct standard instrument cluster. At first I had to remove the console as my Challenger
don´t have one. I split the interieur tub with a hobby-saw, sanded of the console, filled the hole with modelling putty and painted the tub with Tamiya´s french-blue #10. I added
stripes of bare metal foil to the floor to simulate the door sill that can bee partly seen from inside in the real car. I flocked
the floor with blue flocking material from The Model Car Garage and added scratch-build accelerator, power-brake and parking-brake pedals with painted, photoetched pads from The Model Car Garage.
.Revell´s 1970 stock interieur base

The flocked floorboard with removed console and mounted pedals
The door-panels are detailed with bare me tal foil and photo-etched window-cranks and a dodge bage from MCG´s
Challenger detailing kit. The knob on the window-crank is scatchbuilt.
tal foil and photo-etched window-cranks and a dodge bage from MCG´s
Challenger detailing kit. The knob on the window-crank is scatchbuilt.
I needed to simulate the longitudal seat pattern of the ´73 models and transform the single backseats to a more
bench-like form. To achieve this I sanded of the original pattern and glued customized parts made from a computer hard-disk cable to the seats and rear bench. After priming and painting it in two-tone color it looks
pretty realistic. The seatbelts were made of stripes and photoetched supply from The Model Car Garage. To have the correct rear speaker cut-out pattern on the package tray I glued 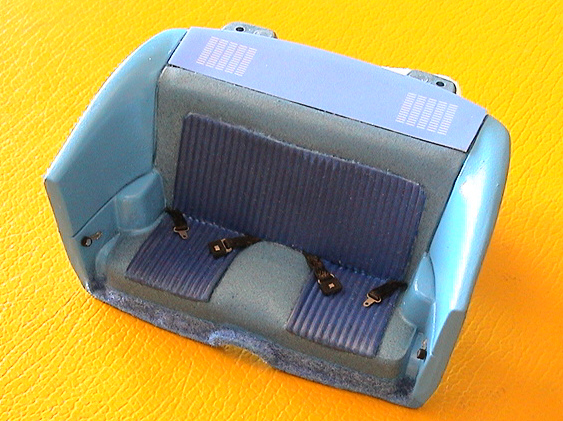 a self designed computer print-out in place. The window cranks are the same as from the door panels.
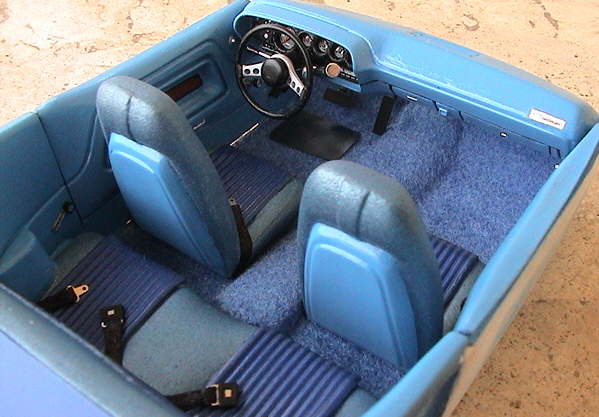
And here the assembled, finished interieur. Note the Challenger dash-emblem and the vinyl carpet-insert on driver´s side
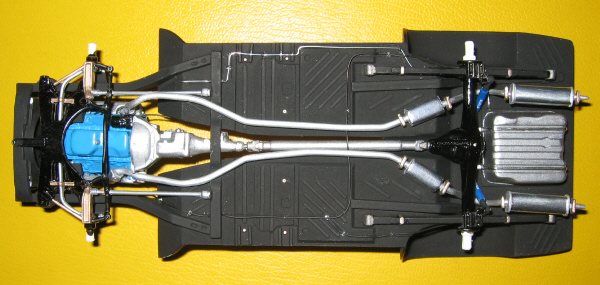
Next step is the chassis assembly, I glued the engine in place and detailed the chassis with brake and fuel lines. The exhaust pipes and mufflers are from the AMT/Ertl Challenger and I added the pipe clamps from the parts box. The shock absorbers are scratchbuild while there are none in the original kit.
To convert the body to the 1973 style I cut of the front end and tailagte from the ARII Challenger and adapted them to the Revell body. The scale is not matching 100% while the ARII is 1:24 and Revell 1:25 but the result looks realistic to me. I glued on body side moldings and the trim for the vinyl roof using strip styrene and sanded off and filled the body side marker light as they are uncorrect for the late modelyears. For painting I used a conventional hobby spray can with a blue tone that matched the original B3 super blue. The original enamel for my 1:1 car did not work with my spray gun. The roof was covered with MCG white vinyl roof tape that looks pretty realistic but is not simple to apply .Note the fender mounted indicaters.
